Just as a pre-cursor to any responses – I worked this out on the fly. I’m not a programmer, and not a world class studio engineer… however, I managed to get and external multitrack source song, recorded in Logic Pro (whichever version was around in 2011), to play via a USB as a multitrack file, on the Ui24R… and here’s how. This was all Mac OSX based, but it should be a similar procedure on PC.
A. CREATE THE STEMS FROM YOUR EXISTING MULTITRACK
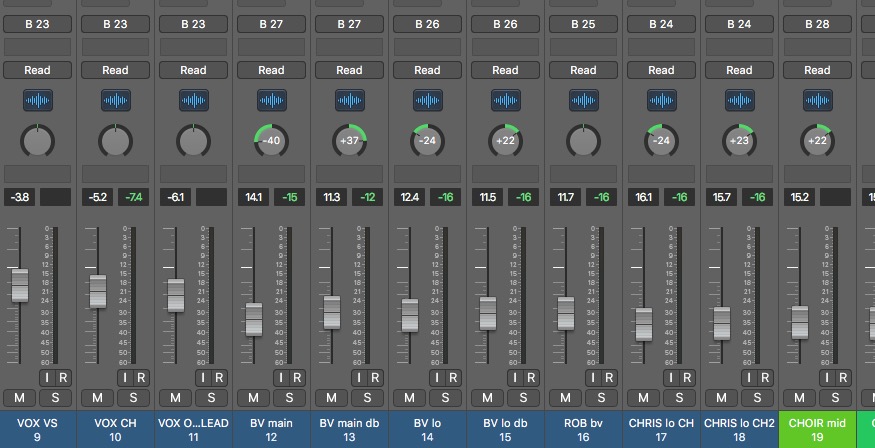
- Firstly, in Logic, I opened a full multitrack song. In my case, it was a demo of One Day Like This (by Elbow) – recorded and played by my band, Rollercoaster. Probably at this stage best to save as an ‘alternative’, or ‘save as’ – so you don’t change your original mix. I went through the channels and effectively grouped them, sending them to busses (changing the outputs – see image 1)
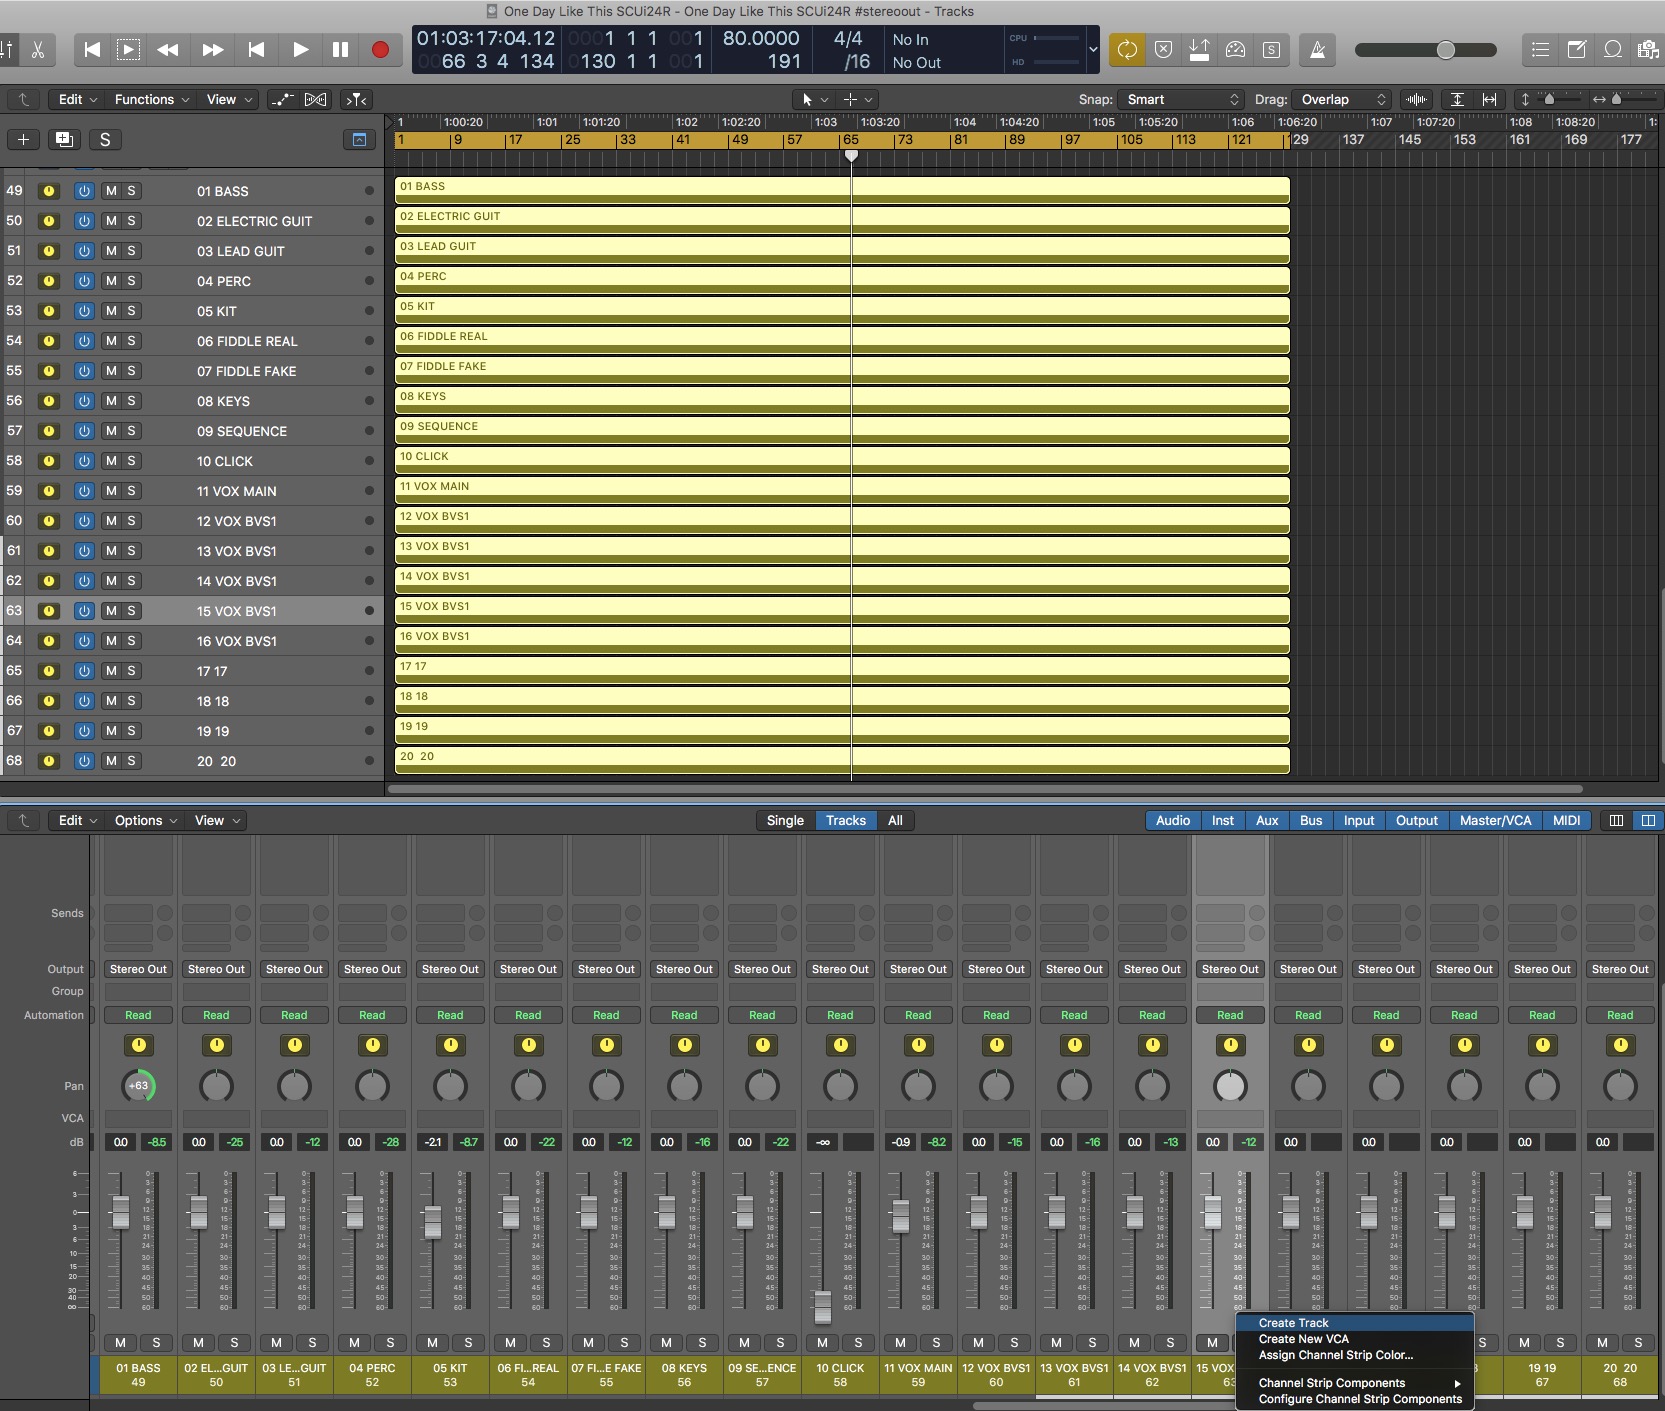
- From the busses, I clicked ‘add track (see image). I made sure that each track was clicked to be ‘mono’ (IMPORTANT). Make sure you have no clipping on the gains.
- On the aux tracks on the arrange page, with the pencil tool, I created blank regions, and extended them all to the full length of the track. This would ensure all the files are equal in size and length. (note – don’t name the spare auxes as numbers as I did in the example – I think it confused the Ui24. I renamed them ‘s1’, ‘s2’ etc.)
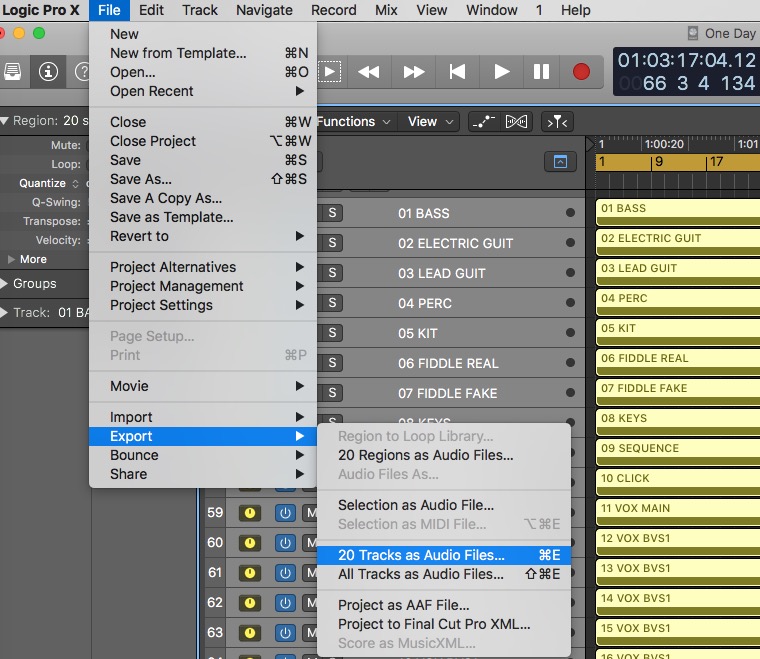
- I then selected all the aux tracks on the arrange and exported – without normalising. The resulting wavs may have ‘-01’ after them. Delete this (they may not – it may happen at the next step).
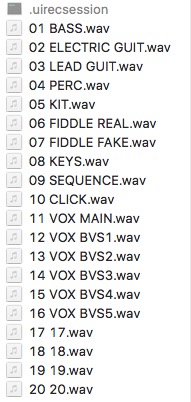
- You need to check that the files are at 48khz. Mine were at 44.1khz, as this was the original session. To my knowledge, the Ui24R works at 48khz. Click a file and ‘command-i’ it. The info will tell you the sample rate and bits. At this stage, you may need to convert the files. I wanted to create a 24bit 48khz multitrack, so I needed to convert the sample rate. To do this, I went to the audio pool (in Logic – Window-Browsers-Project), added all the audio tracks, then selected them, then converted the sample rate from 44.1 to 48.
- Put the final files into a folder called ‘0002’ – for example. Folder 0001 will contain the ‘template session’. NOTE: all this is done on the computer hard drive. It will be copied across later.
B. Create the template folder and files from the Ui24R
- On the Ui24, create an new show, and a snapshot called ‘One Day Like This USB’ (it can be anything – this is just so you don’t mess up any previous shows you have – I’ve called it the name of the song)
- Name your mix channels the same as the stems you have created – this just makes it easier later.
- Record about 10 seconds of silence via the Ui24 onto a USB – with 20 channels patched – onto a USB stick
- I opened this USB on my computer. On the Mac you have to view hidden files – see here – Quickly Show/Hide Hidden Files on macOS Sierra, OS X El Capitan & Yosemite | Ian Lunn – WordPress & Front-end Developer
- The result, was a folder called ‘0001’, and the contents were the wavs PLUS the important .uirecsession file (see image).
- I then download the free programme ‘Mediainfo’ – MediaInfo Mac (Mac) – Download – I would use this to examine the .wav. I would also use Adobe Dreamweaver to edit the .uirecsession file. There is probably a script editor to do this – and you can probably do it via terminal… as it was, I have Dreamweaver, and it works!
- On your USB, Duplicate the ‘0001’ session folder, and name the duplicate ‘0002’. Delete the wav files in ‘0002’ LEAVING THE .uirecsession file.
- Open the .recsession file in Dreamweaver (or what ever app will edit such files – some kind of text editor)
- In Media Info, open one of the wavs you have recorded. You will see the following details:
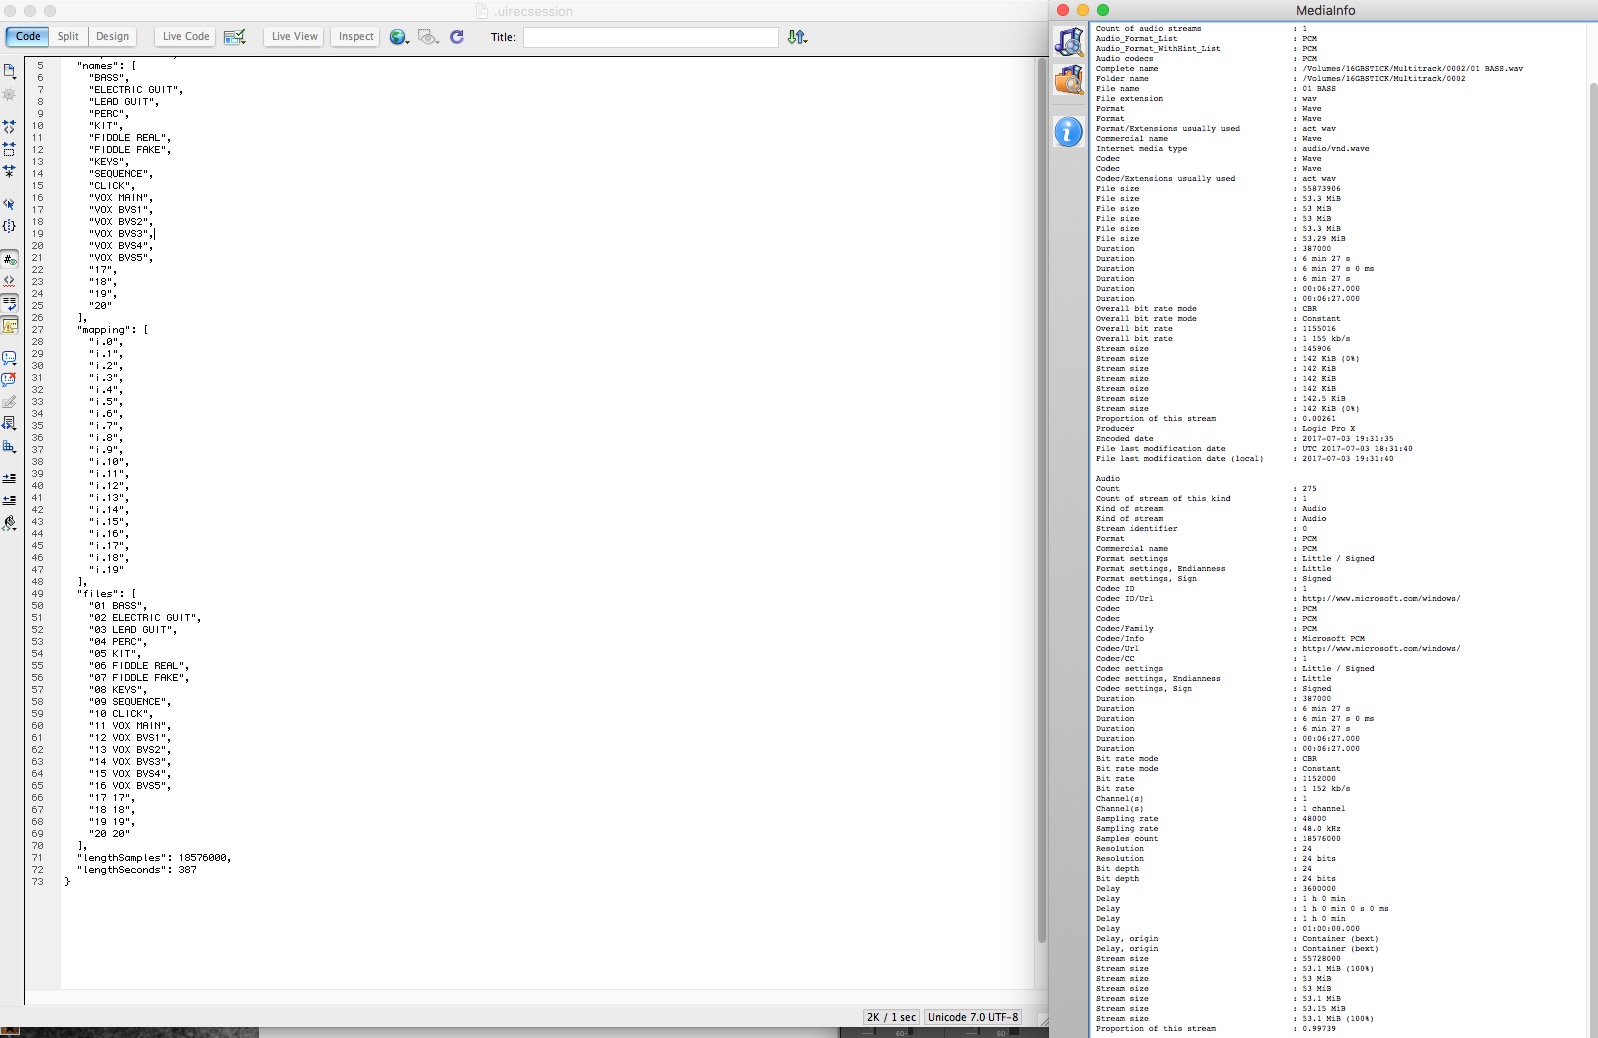
- You will need to replace just 2 elements in the .uirecsession file. This data is at the very bottom – lengthSamples and lengthSeconds. And these two figures are located in the .wav file (it can be any of the files, as they should all be the same length). So you need to input the duration in seconds. The Ui24 records this to 18 decimal places – this is the only shakey part of the process, as without the correct formula, i couldn’t be that precise. As it stands, it works with just putting in the complete seconds.
In the .wav meta data, these are the relevant tags to look for: Duration, and Samples Count (see image)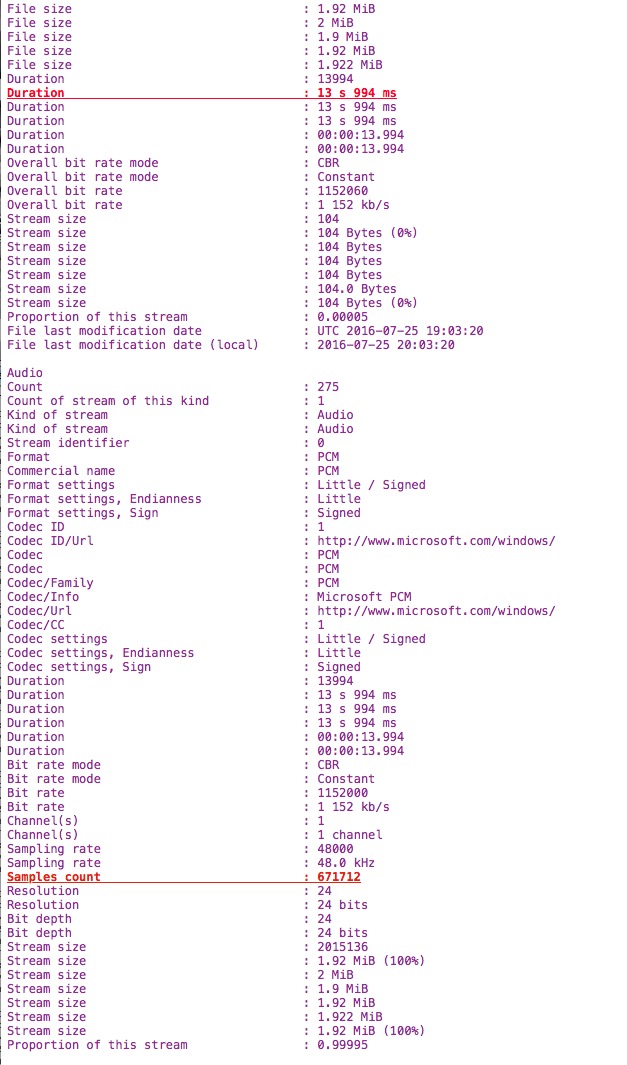
- On the .recsession file type in the duration, in seconds (if you can get a decimal point put it in – leave it if you just have whole numbers), and type in the samples count.
- If you have been doing all this on the hard drive, copy the ‘0002’ folder onto your memory stick.
- Insert into the ‘rec’ slot of the Ui24R, and wait say 15 seconds. Then go to the multitrack play section and play the song! (remember to go to your ‘Patching Page’ and click on USB-A, and PATCH 1:1.)
NOTE: I have since found that you can call the session folder anything – I named it ‘One Day Like This’ and it worked… great if you want to have different soundcheck songs – in our case, if the drummer doesn’t make the soundcheck with his electric kit… not that this is relevant for everyone.
See below for the zip file of the ‘Multitrack’ folder of this song. Naturally, it is just to be used for test purposes, and not to be commercially distributed, or used as a backing track in any situation. Basically, use it to test out the features of the Soundcraft Ui24R. Apologies inconsistencies on the source recording – it was recorded in a noisy studio, through a very much out of date Motu 828 MKII… however, if mixed correctly, you should be able to get a good result – we certainly do. Enjoy!
If you do find this zip file super useful, or if you decide to go ahead and use it as a backing track (we can’t stop you), then a ‘studio contribution’ would be appreciated – click the button below, pick a figure and do it through Paypal… it’ll keep the band happy!


Look at this tool which I made today. 🙂 https://www.youtube.com/watch?v=Lqhu018isU0
You absolutely rule!!! this is amazing!!! it saved our whole gig!